To follow along with this guide, go to geoscape.app and log in or sign up.
The dashboard
This is the dashboard, which shows recent orders and the map. You can move the map around by left-clicking and dragging. Rotate the map by right-clicking and dragging left to right, or tilt the angle of the view by right-clicking and dragging up and down. To zoom, scroll the mouse wheel up and down.

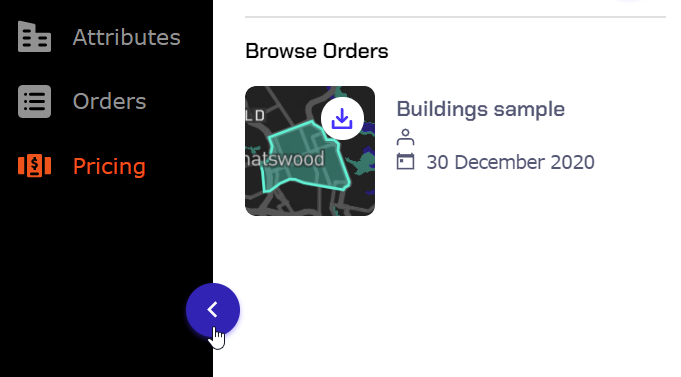
You can collapse and expand the menu on the left by clicking the blue arrow button.
Generating a quote
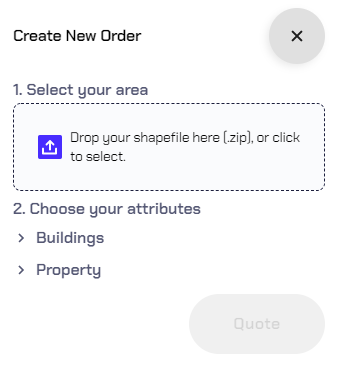
In the top left, click the blue plus button.
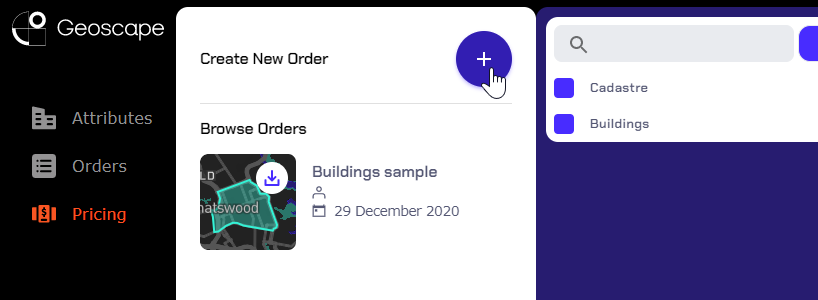
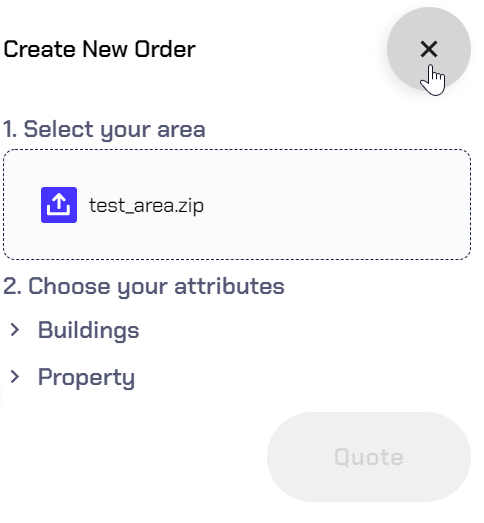
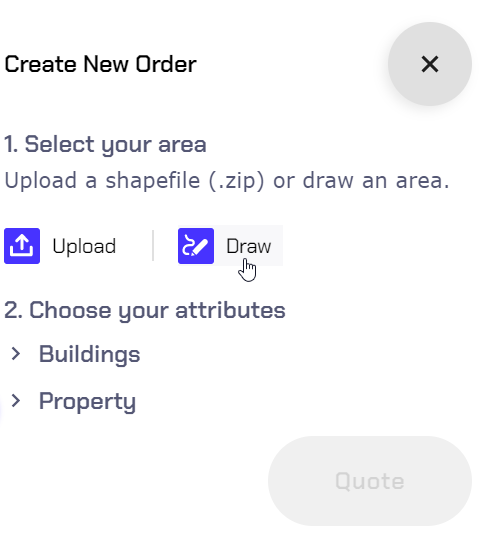
This will make the quote panel appear. Now you can choose to upload a shapefile, or to draw an area on the map.
Click the grey x button to cancel a quote at any time.
Uploading an area
Want to learn how to make shapefiles in QGIS 3? We have an in-depth guide here.
Or skip ahead to drawing on the map ↓
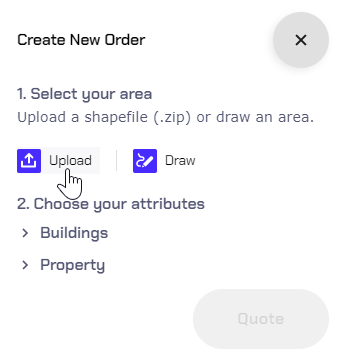
Click the Upload button to upload a .zip containing a shapefile.
Important!
Your file must be a .zip format containing a shapefile (.shp) and its associated files.
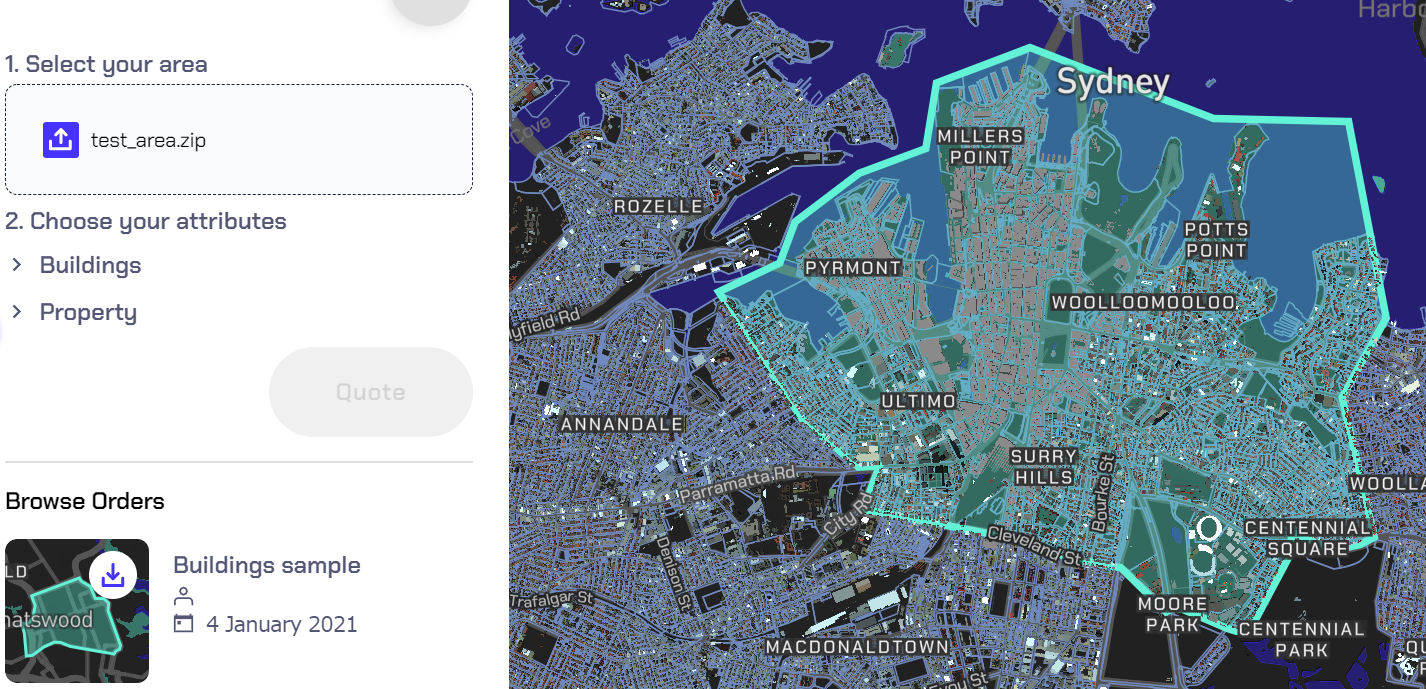
Either drag and drop the zip file into the dotted area, or click within the dotted area to select a zip file from your file explorer.
Once selected, the name of the shapefile will appear within the dotted area.
And the map will move to show the extent of the area.
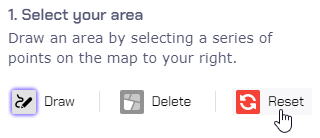
Drawing an area
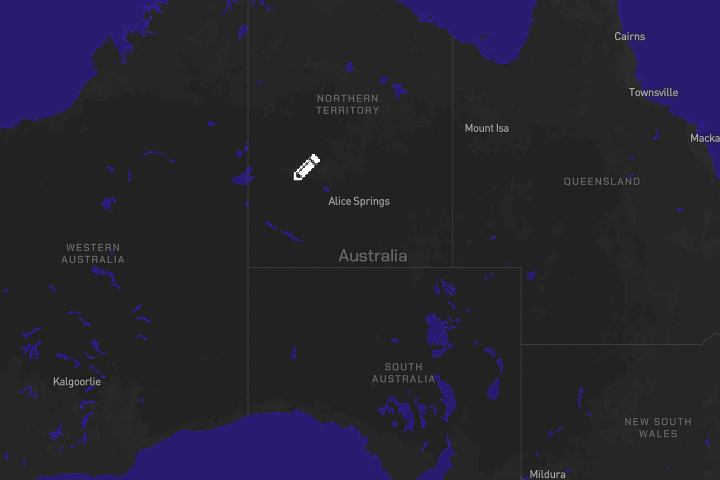
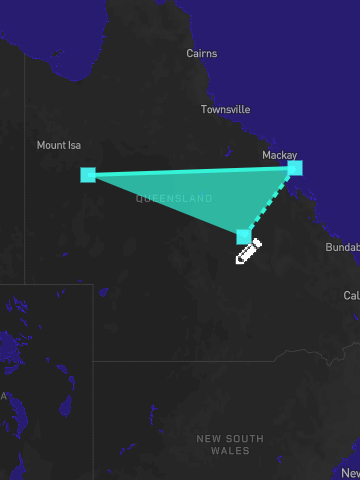
Click Draw to begin drawing an area on the map.
When you click Draw the drawing tool is automatically turned on.
When turned on, the cursor changes to a pencil icon while over the map:
![]()
You can place points on the map by left clicking.
While the drawing tool is enabled, you can move around around the map without placing points by clicking and dragging with the left mouse button or the scroll wheel.
 OR
OR 

To complete the shape, left click again on the first point, or double click to place a final point.
If you need to start over, you can clear drawn areas from the map by clicking Reset
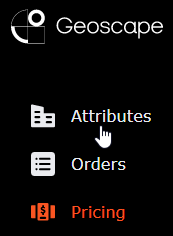
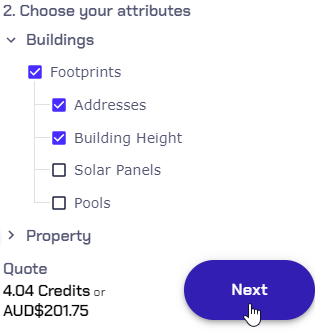
Selecting Attributes

Click Attributes to view a detailed explanation of the data included with each attribute.
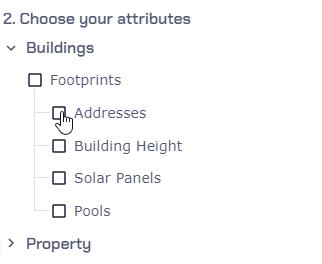
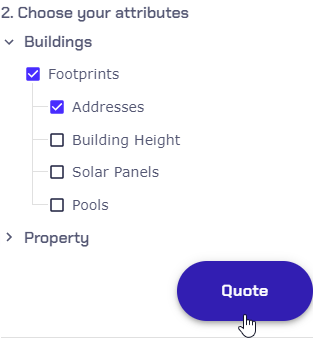
Footprints will be automatically selected when selecting Addresses, Building Height, Solar Panels or Pools. The same is true for Cadastre when selecting Planning Zones. Our data is structured as spatial data (the footprint or cadastral parcel) with attributes attached (such as addresses or planning zones).
Once you've selected the attributes you'd like, click Quote.

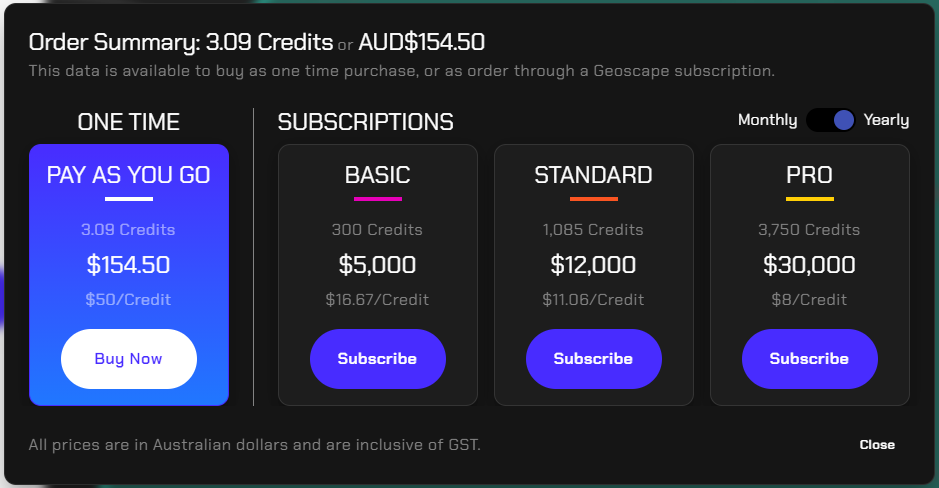
Quoted credit amount
Clicking Quote calculates the number of credits required to order the chosen attributes from the selected area.
If you don't have a subscription, it will also calculate the price in AUD and display the cost for a one time purchase or subscription.
If you subscribe at this stage, you won't lose any work and will be returned to your order.
Click Buy Now to proceed with a one time purchase. Or click outside of the pop up if you'd like to change the quote.
Select another attribute and click Quote again to get an updated quote amount.
You'll again see the quoted credit amount and cost in AUD.
Now click Next to add a name to the order, and review the order details.
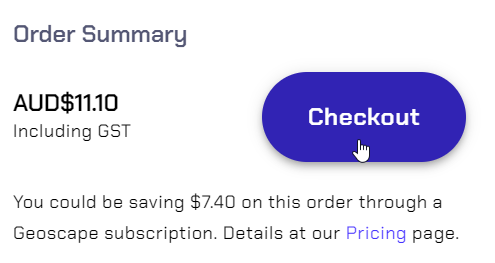
Reviewing the order details
Here you can give a name to the order (up to 20 characters), and you will see a thumbnail of the selected area.
The review screen also displays whether the area was drawn or uploaded, which attributes were selected, and how many of each attribute were present in the selected area.
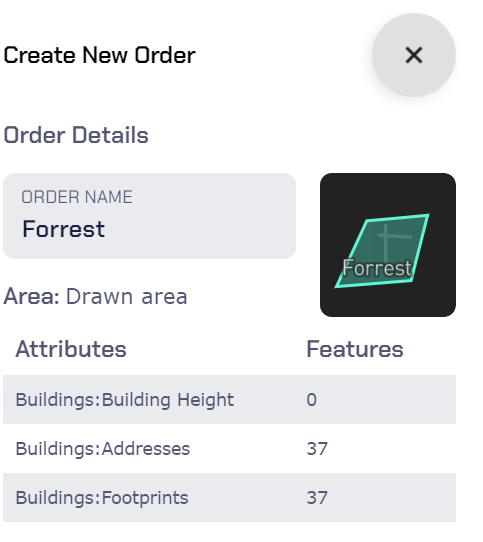
Below this is the order summary, which shows a dollar amount in AUD for one time purchases. And for orders on a subscription, shows the credit amount and a dollar value in AUD. Click Checkout to proceed.
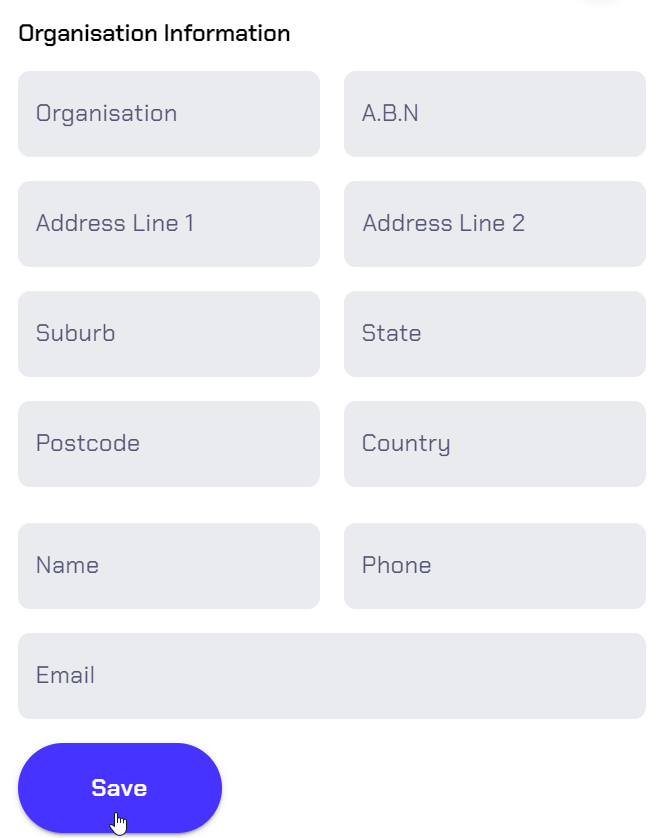
Organisation and billing details
If you haven't already entered organisation, you'll be prompted to do so now. All fields are mandatory except for Address Line 2. Once you're ready, click Save.
Payment method
If you haven't entered one already, you'll now be prompted to enter card details.
Fill these out and click Save.

One last time you'll be shown the order details, as well as the organisation information.
Click Edit next to Organisation Information or Payment Method to make any changes.
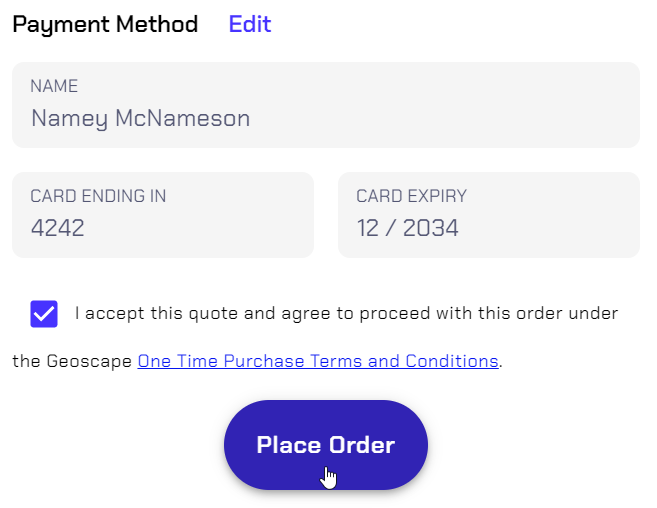
Placing order
Scroll down to see the selected payment method, and to accept the terms for purchase.
Finally if all the details are correct, click Place Order.
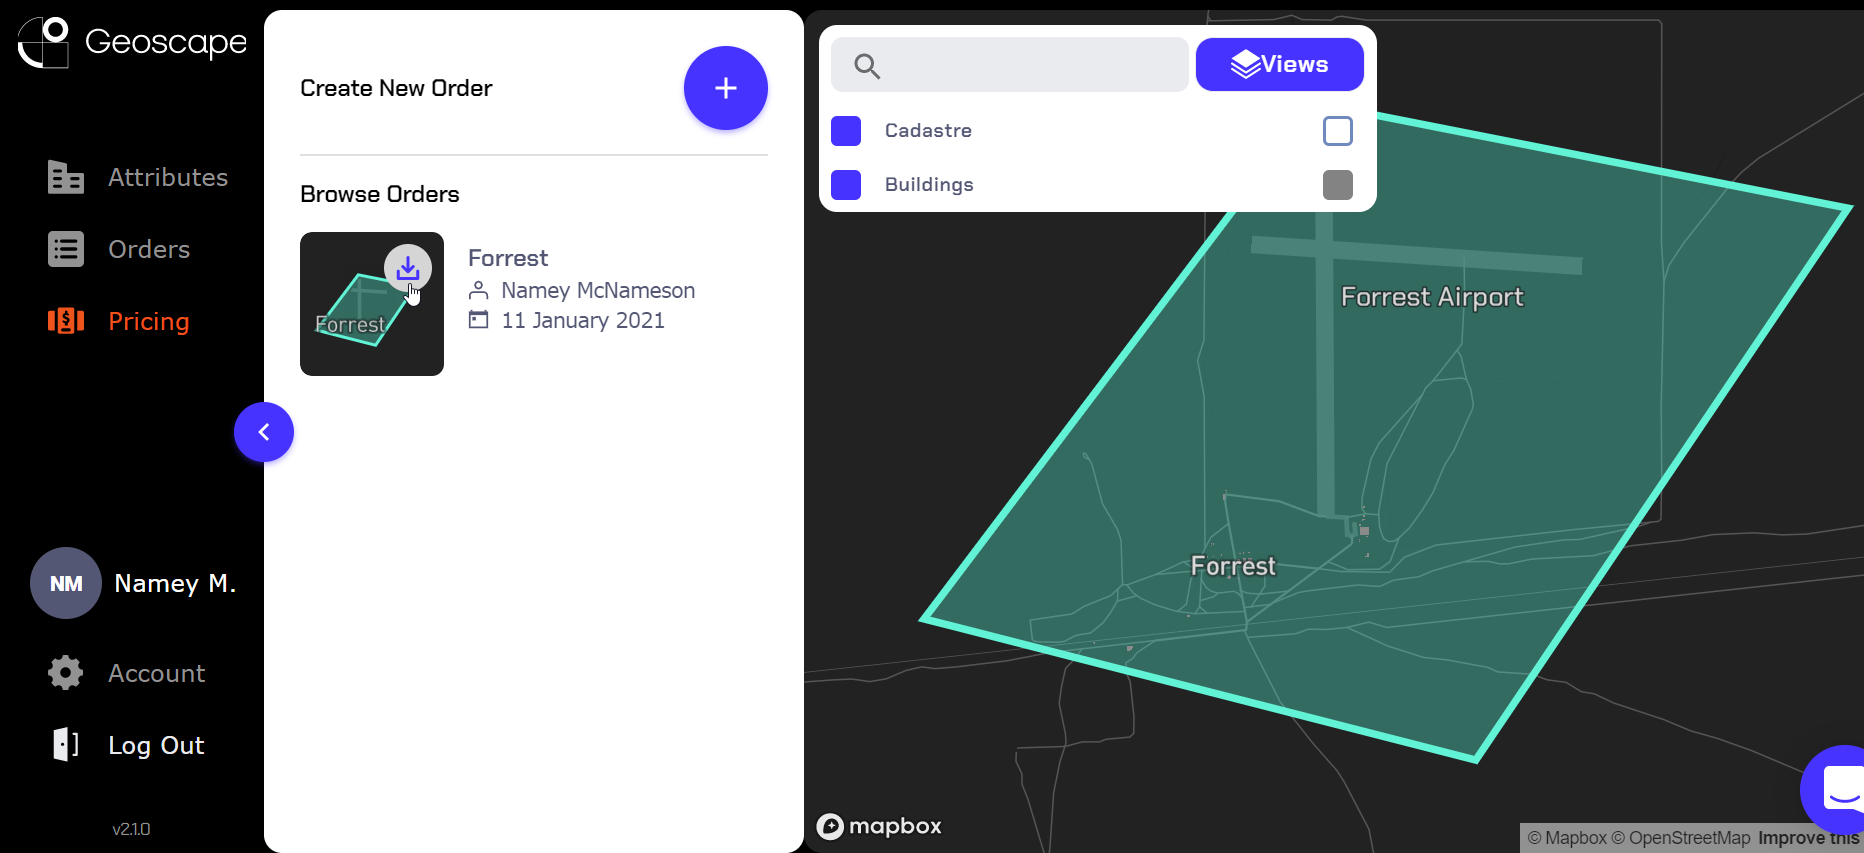
Once the order has been placed, it will close the ordering screen, and return to the map view. You can now see it on the left hand side of the screen under Browse Orders.

While the order is processing, it will show a spinner icon. You can refresh the page to check if it has finished processing. Once it has, the icon will change to a clickable download button. Click to begin the download, and also display the area on the map.
Finish
![]()
That's a brief overview of the process to select an area and download data. If you need any help, click on the chat icon in the bottom right hand corner to get in touch with us directly.